
As previously posted I have already built one of these Swift Sixteen coaches but as promised, here's a detailed description of how I built the next one with tips and advice based upon my experience. Other coaches in the series can be built in the same way.
In my first coach I drilled the holes for the handles, grab rails, couplings and brake pipes after it had been painted, which in hindsight would have been simpler and less risky if I had drilled the holes prior to assembly.

Drill bit sizes used were:
Handles: 2.0mm
Grab rails: 1.2mm
Couplings: 4.5mm
Brake pipes: 1.0mm & 2.0mm
These sizes are based upon Swift Sixteen Detailing Parts.
Of course, holes and their sizes are determined by your choice of furniture.
Another useful tip to simplify the making of the windows, is to cut and loose fit the panes now whilst the coach panels are not assembled. This will later assist with the paint spraying after the assembly of the panels. Label the panes per side and set aside.

Rub down the four inside faces of the coach panels with a fine "wet & dry" sandpaper and then wash in soapy water. Dry and then mask the bottom inside edge of the two side panels with 10mm masking tape. This will allow you to glue the side steps later in the build.

Glue the four sides together ensuring all's square. Leave for half an hour or so to set.
Pilot hole: 1mm
Panel hole: 2.0mm
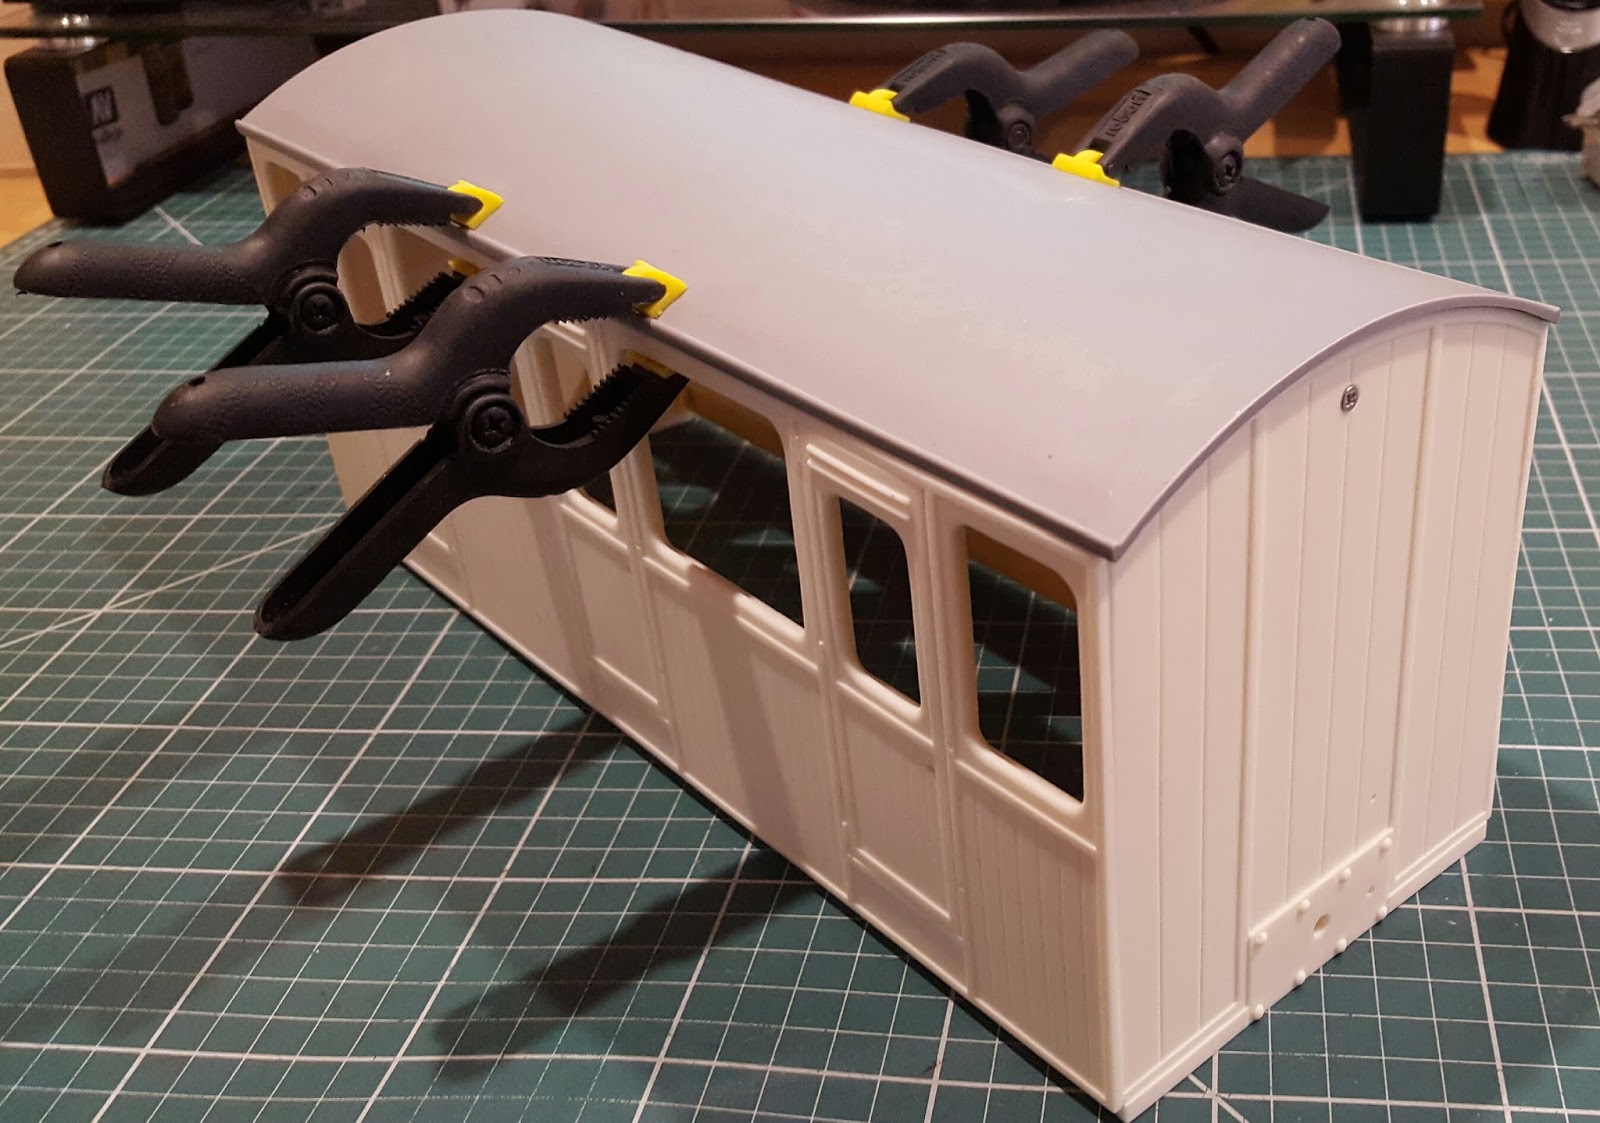
I found this was a good time to drill the holes for the roof fitting. Measure 10mm down and centrally from the top of each end panel and drill the pilot hole. Loose fit the roof, hold in position and drill the pilot hole through to the roof section of each end. Remove the roof and drill each panel hole. Slightly counter sink to accommodate the screw head. Now refit the roof and screw the sections together. I found it a good idea at this point to use the "hair-dryer" treatment to help shape the roof into position, especially in the centre. The use of clamps held it during this process. Once cooled, remove the clamps and check for fit.
 The floor needs to be cut around the perimeter to enable it to fit inside the internal coach panels. For this I used a Dremmel and cutting wheel. Approximately 2mm from each edge.

To add some weight and to enhance the appearance of the floor I used "coffee stirrers", individually glued to create the look of floorboards.

Once glued, sand the boards and edges.
 Turn over the floor and fix the axle holders between the moulded bars, the stiffening bars and side frame detail.
In preparation for painting insert a small strip of masking tape into the axle grooves ready for the gluing of the axles later.
 I use Vallejo Model Air spray paints for painting. All components were initially painted with a grey surface primer (74.601).
The inside coach walls and wooden seats were painted Mahagony (71.036).
 Refit the panes and wedge coffee stirrers with blu tack between them to secure in place.
 Mask the top and bottom openings prior to spraying.
 For my colour scheme the top half of the coach was painted Sand (Ivory) (71.075).
 Once the top half had dried it was carefully masked from the "join" line upwards.
The bottom half was then painted Dark Brown (71.042).
 Again and once dried, all masking tape was removed.
Gloss Varnish was then applied to the external sides and end panels (70.510).
 The underneath and running boards were top coated with Black (71.057) before a finishing coat of Satin Varnish (70.522) was applied.
 The seats were finished with Gloss Varnish (70.510).
 The 10mm masking tape was removed from the bottom of the side panels and the running boards were fixed.
 The floor was then dropped into position and glued to the running board hangers.
 The seats were then fixed to the wooden flooring.
Using the holes made at the beginning, the grab handles, door handles, buffers and brake pipes were all fixed in place.
 The roof was painted in two stages, internal and external. First the internal with Aged White (71.132) and the external with Medium Sea Grey (71.049). When the internal had dried it was completely masked off before the external was applied.
Both surfaces were finished off with Matt Varnish (70.520).
The windows were refitted and secured in place using PVA glue which I found to be better and less obvious than other glues. However and since then I have found Deluxe Materials Glue 'n' Glaze to be just as good.
And finally, the finished roof was fitted and screwed to the end panels.


In preparation for painting insert a small strip of masking tape into the axle grooves ready for the gluing of the axles later.

The inside coach walls and wooden seats were painted Mahagony (71.036).


The bottom half was then painted Dark Brown (71.042).

Gloss Varnish was then applied to the external sides and end panels (70.510).


 The seats were then fixed to the wooden flooring.
Using the holes made at the beginning, the grab handles, door handles, buffers and brake pipes were all fixed in place.

Both surfaces were finished off with Matt Varnish (70.520).
The windows were refitted and secured in place using PVA glue which I found to be better and less obvious than other glues. However and since then I have found Deluxe Materials Glue 'n' Glaze to be just as good.
And finally, the finished roof was fitted and screwed to the end panels.
