Saturday 31 December 2011

Trackbed


Back in Spring 2009, the creation of Homestyal Light Railway began.  Here follows the method that I used for the construction of the trackbed.

Most of my garden is relatively level so building the track bed wasn't too difficult as it only had to vary between two to four inches above the existing terrain.

Using LGB R3 (16000) curves and straight sections as templates I was able to construct the trackbed with tanalised decking planks supported on light weight breeze blocks positioned at regular intervals.

Most sections of curve were represented by two R3 (16000) pieces whereas each straight section was made from various lengths, all divisible by 300mm (10000).

Once the decking planks were in position each individual section was covered in heavy grade mineral roofing felt. This would both protect the wood from the elements and provide an initial surface for the track to adhere to prior to the ballast being laid. 

Mineral felt laid, daffodils re-located and completion of the home loop.

The track bed was fitted with a 95mm x 6mm uPVC edging strip which would provide additional protection to the wood, allow future cabling to be routed and form a boundary for the 20mm green slate chippings. The strip sits approx 8mm above the felt (same height as the sleepers), which will allow for ballast (grit) to be laid in between and around the sleepers whilst preventing the ballast from spreading. 

Before the chippings were put down a weed barrier membrane was laid to prevent weeds from re-appearing. The slate depth varies between 50mm and 80mm. In the foreground are small Boxus plants which in time will form a dwarf hedge. 

With the laying of the chippings complete - the home loop awaits the introduction of ornamental grasses and monoliths and of course, HOMEstyal Halt Station. 

Ornamental grasses, monoliths and a temporary location for HOMEstyal Halt Station complete the construction of the home loop.

Wednesday 28 December 2011

Billy Radio Control - Stage 2b


With the Radio Control equipment fitted, setting and adjustment of the regulator is best achieved with the locomotive 'in steam' and on blocks to raise the wheels off the ground.

Once full working pressure is raised, the transmitter and receiver were both switched on.

The regulator arm was adjusted until the transmitters 'stick' was in the half way position as the wheels began to rotate.

The movement and settings of all linkages can be seen in the above video.

Sunday 18 December 2011

Billy Radio Control - Stage 2a

The receiver was first fitted underneath the cab floor and all wires connected.

Then the linkages and adjustments were made to connect both the regulator and reversing mechanisms to their respective servos.


Fine tuning of the regulator is now required and for this, a full working pressure was raised.

Next stage, the replacement of the cab with a battery box fitted to the underside of the roof.

Thursday 1 December 2011

Billy Radio Control - Stage 1

Before commencing the fitting of the radio control components, the cab had to be removed. In addition to the R/C components, the Roundhouse Fittings Only kit HBK12 was used.


A Hitec HS81 Micro servo was first fitted for the operating of the Walschaerts valve-gear. This was mounted to two brass posts where originally the manual reversing lever was positioned.  The horn and linkage was not fitted at this time.


The regulator servo was then fitted to the bracket on the right hand side of the foot plate. (Fitted during the body stage.) Again, a Hitec HS81 Micro servo without the horn and linkage was fitted.


A switch harness was then fitted to the rear of the foot plate using the cut out provided.


Next stage, fitting and adjusting linkages.

Sunday 27 November 2011

Passenger Starter Set Coaches


In addition to the 'Stainz' locomotive, each Passenger Starter Set comes complete with two passenger coaches in both red & cream and blue & cream.

Wednesday 23 November 2011

Billy goes for another run


Now with the cab fitted, Billy has a quick run before returning to the workshop for her radio control to be fitted.

Covered Wagon


With covered hinged hatches, this wagon is modelled after the cars seen on the Upper Rhine Railway.  This type of car is used as a work car to carry moisture sensitive freight.

Model: Each of the six hatches open independently of one another.
Length: 300mm LGB: 44110

Sunday 13 November 2011

That Figures....

Just like real railways, re-ballasting is carried out all year round.
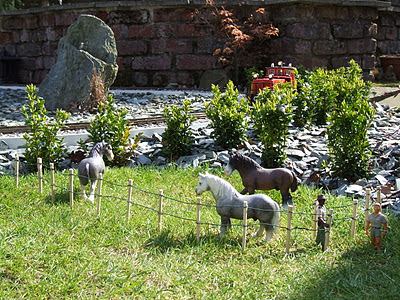
Down in the paddock, the fencing is regularily checked for damage.
Shoppers await the last train of the day.
Good staff supervision is key to the operation of H.L.R.
Periodically Buddleia Pond bridge is checked for alignment.
A lonesome knight salutes a passing train.

Monday 7 November 2011

Open Wagon - High Sided


Many high sided (seven plank) open wagons were used on the narrow gauge lines of the DR.

Model: The double doors on both sides of the wagon open outwards.
Length: 300mm LGB: 4021

DR Box Car


This long box car was used as an equipment car for many years on the DR. 

Model: The doors on both sides of the wagon slide open, 99-52-03.
Length: 300mm LGB: 46350

Monday 31 October 2011

Billy Body - Stage 4

The cab roof was painted with Halfords black gloss enamel and then loosely fitted to the body with two brass screws and nuts. These provided for the hinge enabling the roof to be opened for access. 
Tip - a drop of Loctite was applied to each nut to prevent it from moving.


The body was then carefully placed over the gas tank and lubricator and secured in placed with a brass screw, to the rear buffer beam.

A tank support was then fed under the boiler and attached to the side tanks of the body with two brass screws. 


The dummy brass sanding dome was then slotted over the brass screw in the centre of the boiler and secured with a brass cap. 

The brass dome just sits over the safety valve assembly.


Before the body was fixed in place, all copper pipes and the lubricator were painted with matt black Halfords V.H.T. Engine Enamel paint.


Next stage, fitting of the Radio Control.

Tuesday 25 October 2011

Vale of Rheidol Railway

The 11.75 mile journey takes approximately one hour in each direction between Aberystwyth and Devil's Bridge but on this particular day, sadly no trains were seen running.  However I did manage to take some 'bits & pieces' shots of the railway. 
No.7 chassis belonging to engine 'Owain Glyndwr' awaits her wheels, boiler and body at Aberystwyth station. 
Rolling stock in various state of repair at Aberystwyth station. 
No.10 diesel outside Aberystwyth engine shed. 
The other end of the line at Devil's Bridge station. 
Devil's Bridge station. 
Looking westward along the line at Devil's Bridge station.

Friday 21 October 2011

Train for a Laugh

En-route chuckling her way up the line. 

Giggles all the way, passing Buddleia Pond signal box.  

Tittering across Buddleia Pond bridge. 
Exiting the tunnel to the sound of laughter. 
All this humour and not a soul in sight.

Monday 17 October 2011

Billy Body - Stage 3

The body is first shown here after folding and soldering of all tags. 

Soft solder was applied with Bakers No.3 soldering flux using a small butane blowtorch (the type/size used in the kitchen). 

Warning - The brass will get hot and therefore I recommend the use of oven gloves or similar.

Tip - Whilst soldering, I used a small piece of chamois leather to wipe and smooth out the solder prior to it setting.

The dummy tank fillers were glued in place with araldite and then left 24 hours to set. The whole body was then gently rubbed down with fine grade  wet and dry paper. 

Again, I applied Isopropyl alcohol cleaner with cotton wool balls to remove any flux and oil residue, followed by a hot water and detergent bath. The body was then dried using an electric hair dryer.

The body again was sprayed with one coat of etching primer and two coats of Halfords grey enamel primer. 

Not shown here, but the roof was also prepared as above. 

Left for 24 hours before the cab was sprayed four coats of Halfords Racing Green enamel. 

After a further 24 hours, the dummy whistle, spectacles and handrails were fitted. 

Tip - to secure the handrails, a drop of Loctite 601 was applied to hold them in place.

Next stage, fitting the cab and roof to the chassis.

Tuesday 11 October 2011

KOF


Originally included in MTS Starter Sets, this little switcher has six directional lights, two flashing roof lights and one cab light. Until I added a little plasticine, its pulling power was a little weak but now with the additional weight, it's strength has increased.

Length: 240mm Weight: 1340g

Minol Tanker


Model: Complete with an opening fill hatch and working drain valve, 99-01-98.
Length: 300mm LGB: 45400

Saturday 8 October 2011

Billy Body - Stage 2

Once painted the floor was fitted to the chassis. To do this the rear edge had to be flush with the rear buffer beam and the hole in the frame spacer had to be visible through the hole above the etched ROUNDHOUSE logo.

The additional two boiler bands were loosely fitted on either side of the sandbox until the boiler was refitted and the cab positioned.

The boiler was refitted and the temporary floor spacer, fitted earlier, was removed. 

The gas tank and burner were replaced and the pipes reconnected.  


The reversing lever was fitted to enable manual operation until the radio control is fitted. 

The lubricator was refitted and positioned centrally above the cab step, with the drain screw slightly overhanging the cab floor.

Next stage, the preparation and painting of the cab.

Wednesday 5 October 2011

The First Day of Autumn


As Autumn begins the garden railway season draws to an end for another year. So to keep the memories alive, I've put together this little video of my coal train that I featured here on my blog earlier this year.

Monday 3 October 2011

The Last Post

The last post service of the day prepares to depart Buddleia Pond Station.
Meandering through the undergrowth requires a vigilant driver.
With the post delivered, it was time to return home.
Approaching Buddleia Pond signal box.
Almost there, Loco 3 approaching home.
The shires in the valley seem to be oblivious of the passing train on Buddleia Pond bridge.